Ready to Elevate Your Camping Experience?

Colman pop-up tent

Unleash the Fun with the Coleman Pop-Up Camping Tent!

Pop-Up, Camp Out, and Chill  

Ever wished you could snap your fingers and have your tent set up instantly? With the Coleman Pop-Up Camping Tent, it’s almost that easy! This tent springs to life within just 10 seconds thanks to its instant pre-assembled poles. 


Room for Everyone


Whether you’re snuggling up with your favorite person or bringing the whole crew, Coleman’s got you covered. Choose the 2-person tent for intimate adventures or the 4-person tent for fun family escapades. There’s plenty of space for everyone and everything, from sleeping bags to marshmallow sticks

Rain? Bring It On!


Rainy weather can’t rain on your parade with this tent’s adjustable rainfly and taped floor seams. Stay dry and cozy inside while you listen to the soothing sounds of nature. Dance, play games, or tell ghost stories without a care in the world—this tent keeps you snug as a bug!


 Built to Last


With Coleman’s legendary durability, this tent is ready for all your wildest adventures. Made from high-quality materials, it can withstand anything nature throws your way. Camp like a pro with gear that’s designed to last season after season.


Why Wait? Adventure Awaits!


Life is too short for boring camping gear. Grab your Coleman Pop-Up Camping Tent and let the fun begin! Set it up in a flash, enjoy the great outdoors, and make unforgettable memories. Click the link below to get yours now and start your epic camping journey!


Pop up, chill out, and camp on with Coleman! Experience Effortless Camping with the Coleman Pop-Up Camping Tent 

Camping is a beloved pastime for many, offering a chance to disconnect from the hustle and bustle of daily life and reconnect with nature. However, setting up a tent can often be a daunting task, especially for beginners. Enter the Coleman Pop-Up Camping Tent, a game-changer in the world of camping gear. With its instant setup, weather-resistant features, and durable construction, this tent is a must-have for any outdoor enthusiast.

Coleman is a trusted name in outdoor equipment, with over a century of experience in providing reliable, innovative gear. When you choose a Coleman tent, you know you’re getting a product backed by a legacy of quality and customer satisfaction.

 Ready to Elevate your camping experience with these camping essentials 

I am a Amazon affiliate who earns a small portion of each sale

  1. Tent
  2. Sleeping bag
  3. Flash light
  4. Bug repellent 
  5. Food & water
  6. Cooler
  7. Chair
  8. Compass /GPS/ Map
  9. Dishes
  10. personal hygiene/ clothes
  11. Fire starter
  12. marshmallow sticks
  13. Weather radio
  14. Battery powerbank

Happy camping, and may your outdoor adventures be filled with joy and discovery!


Colman pop-up tent
Coleman pop-up tent


Birdwatching’s Campanion: A Field Guide to Birds

Birdwatching
Birdwatching

Connected with Nature


Birdwatching can be a deeply rewarding hobby, offering both relaxation and excitement as you spot and identify various bird species. Here are some essential techniques to enhance your birdwatching experience:

Embark on exciting birdwatching with a fun and engaging guide! 

Getting Started with Birdwatching 

Identifying Birds

– Key identification features (size, shape, color patterns)
– Bird calls and songs
– Using field guides and apps 

-Popular apps~Picture Bird, ebird and Merlin Bird ID

Birdwatching Techniques

– Best practices for spotting birds
– How to approach birds without disturbing them
– Tips for taking notes and keeping a birding journal

Patience and Quietness

– Stay still and quiet. Birds are easily startled by noise and movement. 

– Allow time for birds to get used to your presence.

Use the Right Gear

 – Invest in good quality binoculars with a magnification of at least 8x.

– A field guide or birdwatching app can help with quick identification.

Best Times to Watch

– Early morning and late afternoon are the best times to see birds, as they are most active during these periods.

– Check local birdwatching reports for peak migration times and species sightings.

Know Your Habitat

– Different birds prefer different habitats (forests, wetlands, urban areas). Familiarize yourself with the habitats in your area and the types of birds they attract.

 – Visit various habitats to see a greater variety of species.

Observe Behavior

– Note bird behaviors such as feeding, flying patterns, and social interactions. Behavior can be a key clue in identifying species.

– Pay attention to how birds interact with their environment, like where they perch or how they forage.

Learn Bird Calls and Songs

– Birds often reveal their presence through sound before they are seen.

– Use audio guides or apps to learn and recognize different bird calls and songs.

Take Notes and Keep a Journal

– Record your observations, including species, location, time, weather conditions, and behaviors.

– Over time, you’ll notice patterns and improve your identification skills.

Use Proper Field Etiquette

– Respect wildlife and their habitats. Avoid disturbing nests or feeding areas.

– Be considerate of other birdwatchers; share sightings quietly and avoid crowding.

Enhance Your Spotting Skills

– Scan with your eyes first to spot movement or color. Use binoculars for a closer look.

– Learn to identify birds by silhouette and flight pattern.

Blend into Your Surroundings

 – Wear neutral-colored clothing to avoid standing out.

 – Use natural cover like trees and bushes to stay hidden while observing.

Utilize Bird Feeders and Baths

 – Attract birds to your yard with feeders, bird baths, and native plants.

 – Provide a variety of foods (seeds, suet, nectar) to attract different species.

Join Birdwatching Groups

 – Join local birdwatching clubs or online communities to share tips and experiences.

 – Participate in bird counts and surveys to contribute to conservation efforts and gain experience.

Now, are you ready to experience your birdwatching adventure?  Here’s a list of items that you’ll need.

Birdwatching gear 

Binoculars~ Binoculars

Field guide

Field chair~ Field chair

Backpack~ Backpack

Insect Repellent~ Insect Repellent

sunscreen~ Sunscreen

Camera~ Camera

Spotting scope

Journal /pen

Hiking boots~  Hiking boots

Compass

Bird feeder

I am a Amazon Affiliate who earns a small portion of each sale at no extra cost to you.

What does everyone need for birdwatching? 

A good pair of binoculars. 


High Powered with phone adapter, light weight idea for birdwatching, stargazing and more


Binoculars


Step by Step Guide to Building a 10×12 Shed

Garden Shed
Garden Shed

Building a 10×12 shed is a manageable project if you have basic carpentry skills and some time. Here is a step-by-step guide to help you through the process:

Materials and Tools Needed:

  • I am an Amazon affiliate who earns a small portion on each sale.
  • My personal top picks for 10 x 12 Garden Shed
  •  

  • 10 x 12 Garden Shed

    10 x 12 Garden shed

  • 10 x 12 garden shed

    10 x 12 Garden Shed

  • 10 x 12 garden shed plans

    10 x 12 Garden Shed Plans


  • 10 X 12 Garden Shed plans


Natures Canvas Blooms and beyond

Designing a Flower Garden: Natures Canvas

Creating a beautiful flower garden is a wonderful way to add color and fragrance to your outdoor space. Here’s a simple flower garden design.

Choose a sunny spot in your yard that receives at least 6 hours of sunlight per day. Ensure the area has good drainage to prevent waterlogging.

Sketch out the layout of your flower garden. You could opt for a traditional rectangular bed, a circular design, or even create winding pathways through your garden.

Prepare the soil by removing any weeds, rocks, or debris. Amend the soil with compost or organic matter to improve its texture and fertility. Lay down landscaping material to prevent weeds. 

Choose a mix of annuals and perennials that bloom at different times of the year to ensure continuous color in your garden. Consider factors like height, color, and bloom time when selecting plants.

Plant your flowers according to their specific spacing and depth requirements. Group plants with similar water and sunlight needs together to make maintenance easier.

Apply a layer of mulch around your plants to help retain moisture, suppress weeds, and regulate soil temperature. Organic mulches like shredded bark or compost are ideal.

Water your flower garden regularly, especially during dry spells. Aim to water the soil deeply to encourage strong root growth.

Deadhead spent flowers regularly to promote new blooms and remove any diseased or damaged foliage. Keep an eye out for pests and diseases and address them promptly.

In colder climates, consider mulching your flower beds in the fall to protect plants from frost damage. In spring, fertilize your flowers with a balanced fertilizer to promote healthy growth.

Finally, take time to enjoy your flower garden! Whether it’s sitting among the blooms with a book or hosting a garden party, your flower garden is sure to bring joy to you and your visitors. 

Creating a Butterfly Garden

Butterflies
Monarch Butterflies

Designing a garden specifically to attract butterflies is a delightful project! Here’s a design tailored to attract these beautiful creatures:

Choose nectar-rich flowers that butterflies love. Some great options include:

   – Butterfly Bush (Buddleia)

   – Coneflowers (Echinacea)

   – Lantana

   – Milkweed (essential for Monarch butterflies)

   – Verbena

   – Black-eyed Susan (Rudbeckia)

   – Zinnias

   – Pentas

   – Salvias

Opt for brightly colored flowers in shades of pink, purple, red, yellow, and orange, as these colors attract butterflies. Consider incorporating a mix of flower shapes and sizes to accommodate different butterfly species.

Include host plants in your garden where butterflies can lay their eggs. For example, milkweed is essential for Monarch butterflies. Research which butterfly species are native to your area and include host plants for them.

Ensure your butterfly garden receives plenty of sunlight, as butterflies are typically active in sunny areas. Provide shelter from strong winds and predators by planting shrubs or installing butterfly houses.

Create a shallow water source, such as a small birdbath or saucer filled with stones, where butterflies can drink and puddle.

Plant flowers of varying heights to create layers in your garden. This provides butterflies with places to rest, feed, and seek shelter from the wind.

Refrain from using chemical pesticides in your butterfly garden, as they can harm butterflies and other beneficial insects. Instead, opt for natural pest control methods or tolerate a small amount of damage.

Regularly deadhead flowers to encourage continuous blooming and remove weeds that compete with butterfly-friendly plants. Provide a shallow dish with a mixture of rotting fruit and water to attract butterflies looking for food and minerals.

By incorporating these elements into your garden design, you’ll create a welcoming habitat that attracts a variety of butterflies, providing endless enjoyment for you and vital support for these delicate creatures.

I am a Amazon Affiliate and this website earns a small portion of each sale.

Wildflower mix
Wildflower mix

Black eyed Susan
Black Eyed Susan Seeds

Cosmos mix
Cosmos Mix Seeds

Hummingbird and butterfly mix
Hummingbird and Butterfly Mix


The Ultimate Moisturizing Power of Snail Mucus

Snail

You can definitely tell when something’s good for you. The fight for moisturizing and anti-aging hasn’t been anything new and neither has Snail Mucus as it was used all the way back in the ancient era.   Today, snail mucus is one of the most popular ingredient’s on the market in skin care. Why? you might ask. Because it’s said to have healing, moisturizing, soothing, brighting, acne-fighting, rejuvenate, intense hydration and here’s the big one anti-aging properties.


COSRX Glass Skin Starter Set, Advanced Snail 96 Mucin Power Essence

Snail mucin is praised in skincare for its hydrating, soothing, and anti-aging properties. 


Snail Mucin 92% Cream + Retinol 0.1 Cream


Anti-aging Serums- Snail Dual Essence 74.3% + Vitamin C 13% Serum, Niacinamide 5%, 


Snail hydrogel eye patch


Snail Hydrogel Eye Patch 60 Patches (3.17 oz) | Undereye Treament Puffy Eyes

“Revitalize your skin with Snail Mucin Skin Care Moisturizer and Anti-Aging Creams. Experience the transformative power of nature’s secret ingredient. Try it today and discover the difference for yourself!”

It’s rich in nutrients like hyaluronic acid, glycoproteins, and peptides, which can help moisturize the skin, reduce inflammation, and promote collagen production, leading to smoother, more youthful-looking skin.

I am an Amazon affiliate who earns a small portion of each sale.

The use of snail mucus in skincare and medicine has a long and fascinating history that dates back thousands of years. This is a sought-after ingredient in skincare products worldwide, with consumers embracing its natural and multifaceted approach to skincare. Scientist research continues to uncover the bioactive compounds and mechanisms of action behind the therapeutic properties of snail mucus.

“Escargot ~From Garden to Gourmet Delight!”

Fine dining

In France, South Korea, Italy, Spain and others snails are known as a delicacy and eaten in high end restaurants~ escargot.

 A Double Delight for Skin and Palate! Rich in Protein, Iron, and Essential Nutrients for a Healthy Body and Mind From the Dinner Table to Your Skincare Routine Enjoy the Dual Benefits of Nourishing Your Body Inside and Out!”


Feathered Oasis

American Robin
American Robin

Birdbaths are a lovely addition to your garden, providing birds with a place to bathe and drink while adding charm to outdoor spaces.

My absolutely favorite part about birds is the melodies that they play. The gentle chirping of birds has a soothing effect, that can help reduce stress and promote relaxation. It’s like nature’s own calming melodies.

Birdbath in your Garden

Birdbaths attract various bird species, providing them with a source of water for drinking and bathing. 

Beautify your Backyard Organically

Enhance the beauty of your garden. Watching birds splash and play in the water can be entertaining and relaxing, providing a connection to nature right in your backyard.

Natural Pest Control 

Birds are natural predators of insects and pests, so attracting them to your garden can help control pest populations without the need for chemicals.

Educational

Bird watching can be educational, especially for children, teaching them about different bird species, behaviors, and the importance of wildlife.

Birdbaths in dry climates can be essential for your feathered friends. 

Lavender
Lavender

Lavender Benefits for your Birdbath

Using lavender in a birdbath can offer several benefits:

Lavender’s delightful fragrance can attract birds to your birdbath area, enticing them to visit more frequently.

Lavender has natural insect-repellent properties, helping to deter mosquitoes and other pests from congregating around the birdbath.

Lavender’s soothing scent may create a calming atmosphere around the birdbath, making it a more inviting and peaceful environment for birds to bathe and drink.

Lavender adds visual appeal to the birdbath area with its beautiful purple blooms and foliage, enhancing the overall aesthetics of your garden.

Some birds may also use lavender as nesting material or forage for insects among its foliage, providing additional benefits to your visitors in your garden.

Overall, incorporating lavender into your birdbath area can attract birds while offering aesthetic, aromatic, and functional advantages.

Lavender Live Plant

DIY Birdbath

DIY Birdbath
DIY Simple Birdbath

It seems like everyone is into creating some kind of DIY project and birdbaths can be rewarding and easliy created just by using a tomato cage and insert into the ground and add a planters saucer to the top and now you have a simple birdbath.

14”x42” tomato cages

14” planter saucer Black

14” planter saucer Brown

14” planter saucer Gray

Terra-cotta planter saucers can be fun to use because you can use glass gems and nontoxic glue to decor the birdbath.  Now flip the terra-cotta-planters pot upside down and add your saucer to the top by using adhesive.

Red glass gems

Blue glass gems

A decorated ceramic bowl that holds water can also be used. 

Birdbath
DIY Birdbath

DIY Cement Birdbath

Creating a poured concrete birdbath can be a satisfying DIY project. Here’s how you can do it:

Materials:
– Concrete mix and sand 
– Five gallon bucket
– Large plastic or metal bowl (for the mold)
– Cooking spray or petroleum jelly
– Water
– Stir stick or mixing tool
– Sandpaper or wire brush
– Protective gloves
– Safety glasses
– Optional: decorative items such as glass mosaic tiles, pebbles, or shells

Instructions:

1. Prepare the Mold:
– Choose a large plastic or metal bowl to use as the mold for your birdbath. Make sure it’s the size and shape you want for the finished birdbath.
– Coat the inside of the bowl with cooking spray or petroleum jelly. This will make it easier to remove the concrete once it has cured.

2. Mix the Concrete:
– Put on protective gloves and safety glasses.
– In a large container, mix the concrete according to the manufacturer’s instructions. Add water gradually and stir until you achieve a thick but pourable consistency.

3. Pour the Concrete:
– Pour the mixed concrete into the prepared mold, filling it to the desired depth. Tap the sides of the mold gently to release any air bubbles and ensure the concrete settles evenly.

4. Create the Basin:
– Use a smaller bowl or object to create the basin in the center of the poured concrete. Press it down into the concrete until it’s submerged, creating a shallow depression where the birds can bathe.

5. Add Decorative Touches:
– If desired, press decorative items like mosaic tiles, pebbles, or shells into the wet concrete to add visual interest to the birdbath. Be creative!

6. Let it Cure:
– Allow the concrete to cure and harden according to the manufacturer’s instructions. This typically takes at least 24-48 hours.

7. Demold and Finish:
– Once the concrete has cured, carefully remove the birdbath from the mold. Gently invert the mold and tap the sides to release the concrete.
– If there are any rough edges or imperfections, you can smooth them out using sandpaper or a wire brush.

8. Place and Enjoy:
– Find a suitable location in your yard for your newly created birdbath. Make sure it’s stable and level, then fill it with water.
– Sit back and enjoy watching the birds enjoy their new bathing spot!

With these steps, you can create a beautiful poured concrete birdbath to enhance your garden and attract feathered visitors.

“Transform your backyard into a bird paradise today! Click here to explore our top pick for the perfect bird bath on Amazon and give your feathered friends a refreshing oasis to enjoy.” Or even DIY birdbath as a family project.

I am a Amazon Affiliate who earns a small portion of each sale.


Birdbath


Birdbath


Birdbath


Birdbath


Hummingbirds

A hummingbird approaching a feeder

These beautiful birds are fascinating creatures known for their incredible agility, vibrant plumage, and rapid wing beats. They’re among the smallest birds in the world, but they’re mighty flyers, capable of hovering in mid-air and flying in any direction. 

Hummingbirds are known to feed on sugar water, which mimics the nectar they extract from flowers. Sugar water, typically made by dissolving white granulated sugar in water (at a ratio of 4 parts water to 1 part sugar), provides a convenient and easily accessible food source for hummingbirds, especially during times when natural nectar sources are scarce. It’s important to use plain white sugar and avoid using honey, artificial sweeteners, or red food coloring, as these can be harmful to hummingbirds. Additionally, keeping hummingbird feeders clean and changing the sugar water regularly helps maintain the health of these fascinating birds. 

Hummingbirds Nectar Recipe

4 cups water

1 cup sugar

Heat until sugar is dissolved let cool and fill the hummingbird feeders. It takes only a few days for the hummingbirds to find their new feeders or microwave for five minutes.

Keep their feeders clean and refilled is important for their health. 

Hummingbirds Nest

Hummingbirds build remarkably tiny nests, often using materials like plant fibers, moss, and spider silk, which allows the nest to stretch as the chicks grow. Their nests are usually built in sheltered locations, such as tree branches or shrubs, and are camouflaged with lichen or moss to blend in with their surroundings. Despite their small size, hummingbird nests are sturdy and can withstand the weight of the incubating parent and growing chicks.

The Color Red

While hummingbirds are particularly attracted to the color red, they are also drawn to other bright, vivid colors, especially shades of orange, pink, and purple. Flowers in these colors often contain high-energy nectar, making them appealing to hummingbirds. Additionally, some hummingbird species have preferences for specific flower shapes and sizes, regardless of color. Providing a variety of colorful flowers in your garden can help attract and support hummingbirds throughout the season. Many flowers that hummingbirds feed on, such as Trumpet vines, bee balm, and fuchsia, have red or brightly colored tubular blossoms that contain nectar. Hummingbirds have excellent color vision, and they are particularly drawn to red hues, making it easier for them to locate and feed from these flowers. Additionally, red is a high-energy color in the spectrum of light, which may make it more visible to hummingbirds as they forage for food.

Hummingbirds face several challenges, including:

 Habitat loss, changes in temperature and precipitation patterns can affect the availability of nectar-producing flowers, alter migratory routes, and disrupt breeding cycles. Pesticides and Pollution.

 Planting native flowers, and reducing pesticide use, are essential for safeguarding hummingbird populations and their habitats.

I am a Amazon affiliate and this website earns a small portion of each sale.


Hummingbird feeder
Hummingbird Feeder

Hummingbird feeder
Hummingbird Feeder


Foraging Morel Mushrooms

Let’s Hunt Morel Mushrooms

Hunting for morel mushrooms can be a rewarding outdoor activity, but it requires caution and knowledge to ensure a safe and successful experience. 

Here are some tips for hunting morel mushrooms

To hunt for morel mushrooms, you’ll need a few essential items:

1. **Appropriate Clothing:** Wear sturdy shoes or boots for walking through forested areas, as well as long pants and sleeves to protect against ticks and scratches from vegetation.

2. **Mesh Bag or Basket:** Use a mesh bag or basket to collect morel mushrooms. Mesh allows spores to disperse and helps prevent the mushrooms from becoming soggy.

3. **Knife or Scissors:** Bring a small knife or scissors for cutting the mushrooms at the base to avoid disturbing the mycelium underground.

4. **Water and Snacks:** Stay hydrated and energized during your hunt by bringing water and snacks, especially if you plan to spend several hours outdoors.

5. **First Aid Kit:** Pack a basic first aid kit containing essentials like bandages, antiseptic wipes, and pain relievers in case of minor injuries.

6. **Field Guide or Identification App:** Carry a field guide to help you identify morel mushrooms accurately. Alternatively, use a reputable mushroom identification app on your smartphone.

7. **Optional: Walking Stick or Trekking Pole:** A walking stick or trekking pole can provide stability and support while traversing uneven terrain.

8. **Optional: Hat and Sunglasses:** Protect your head and eyes from the sun’s rays by wearing a hat and sunglasses, especially if you’ll be hunting in open areas.

By gathering these items and preparing properly, you’ll be equipped for a safe and enjoyable morel mushroom hunting experience. Remember to familiarize yourself with local regulations and safety guidelines before heading out into the wilderness. Happy hunting!

I am a Amazon affiliate and this website earns a small portion of each sale.


Morel hunting kit
Morel Hunting kit

Morel mushroom foraging kit
Morel Mushroom foraging kit

Thermal camera
Seek Thermal camera


Feathered Haven

DIY Simple Birdhouse

Birdhouse plans
Simple birdhouse plans

The joyful chirping of birds fluttering about, filling the air with melodies and bringing life to your once quiet garden. Adding a bird house to your yard you are bringing a fathered haven sanctuary.  

Fun fact Michigan’s State bird is an American Robin. 

Robin

Flat roof design a DIY birdhouse can be a fun and rewarding project. Here’s a simple yet effective design:

Materials needed:
– 1 piece of untreated wood (8 inches wide, 12 inches long, and ¾ inch thick)
– Saw
– Drill with drill bits
– Screws or nails
– Sandpaper
– Exterior paint or wood sealant (optional)

Instructions:
1. Start by cutting the wood into the following pieces:
– One piece measuring 8×8 inches (base)
– Two pieces measuring 8×6 inches (sides)
– One piece measuring 6×6 inches (back)
– One piece measuring 8×4 inches (front)
– One piece measuring 6×4 inches (roof)

2. Using the drill, create an entrance hole near the top of the front piece. The size of the hole will depend on the type of bird you want to attract. A 1-1/2 inch diameter hole is suitable for many common backyard birds.

3. Assemble the birdhouse by attaching the sides to the base using screws or nails. Then attach the back piece, followed by the front piece with the entrance hole.

4. Next, attach the roof piece by screwing or nailing it onto the top of the birdhouse.

5. Sand down any rough edges to ensure the birdhouse is safe for birds.

6. Optionally, you can paint the exterior of the birdhouse with non-toxic exterior paint or apply a wood sealant to protect it from the elements.

7. Once the paint or sealant is dry, hang the birdhouse in a suitable location, preferably in a quiet area away from predators and human activity.

With this simple design, you can create a cozy home for feathered friends to enjoy in your garden or backyard.

A-frame roof birdhouse is a fun and rewarding project that can attract a variety of bird species to your garden. Here’s a simple design and step-by-step instructions to get you started:

Materials Needed:
– Wood boards (cedar or pine are good options)
– Saw
– Hammer or nail gun
– Nails or screws
– Wood glue
– Drill and drill bits
– Sandpaper
– Exterior paint or wood stain (optional)

Instructions:

1. **Prepare Your Materials:** Measure and cut the wood boards according to the following dimensions:
– Front and back panels: 8 inches wide by 10 inches tall
– Side panels: 6 inches wide by 8 inches tall
– Roof panels (two identical pieces): 8 inches wide by 8 inches long, cut diagonally to form two triangles

2. **Assemble the Frame:** Lay the front and back panels flat on your work surface. Position the side panels between them to form an A-frame shape, with the top edges meeting at a peak. Use wood glue and nails or screws to secure the panels together at the corners. Repeat this step to create the back side of the frame.

3. **Attach the Roof Panels:** Position one of the roof panels on top of the frame, aligning the bottom edge with the peak of the A-frame. Use nails or screws to secure the roof panel in place. Repeat this step with the second roof panel on the opposite side of the frame.

4. **Add Perches and Entry Hole:** Drill a small entry hole near the bottom of the front panel, making sure it’s large enough for the bird species you want to attract. Optionally, attach small wooden dowels or branches below the entry hole to serve as perches for the birds.

5. **Sand and Finish:** Once the birdhouse is fully assembled, use sandpaper to smooth any rough edges and surfaces. If desired, apply exterior paint or wood stain to protect the birdhouse from the elements and add decorative flair. Be sure to use non-toxic materials that won’t harm the birds.

6. **Install and Enjoy:** Find a suitable location in your garden or yard to hang or mount the birdhouse, ensuring it’s secure and at a height that’s safe for birds to access. Sit back, relax, and enjoy watching your feathered friends make themselves at home in their new A-frame birdhouse!

With this simple DIY project, you can create a charming and functional birdhouse that not only provides shelter for birds but also adds a touch of rustic charm to your outdoor space. Happy birdwatching!

I am an Amazon affiliate and this website earns a small portion of each sale. 


Birdhouse
Birdhouse

Create a Birdhouse
Create a Birdhouse

Birdhouse kits
2 Birdhouse kits
Digital art
Spring inspired


Earth Month

Planting tree
Planting trees

April is earth month where the big clean up and the tree planting begins.  Take some time out of our regular hustle and bustle of every day life and start your clean up and planting. Rather if it’s recycling, gardening or composting you’re starting and thats a beginning. 

Let’s take trees for an example. Trees are like superhero’s. Without trees there wouldn’t be enough oxygen for us to stay alive. That’s right trees are like magical oxygen machines. They take in carbon dioxide, which is what we breathe out and turn it into oxygen. Trees also help clean the air, provides a habitat for animals and protects the soil. Trees also have great shade for cooling and also yummy fruits and nuts like,  bananas, apples, oranges and almonds.


Michigan is a great state for growing apple, peach and pear trees.  Then,  there’s the maple tree too. When planting trees decide what’s best for you. You might be thinking about having fresh maple syrup so you will need to plant a Sugar maple tree. Walnut, almond or pecan trees.

Peach tree

Apple tree

Pear tree

Black cherry tree

Eastern white pine tree


Consider planting trees that will produce food to help off set the high prices of groceries and to help you to be more self sustaining. 

Research what grows best in your area. Climates, soil or even how long it would take to produce nuts or fruits.  Now let’s talk about how some trees acid will affect gardens. A black walnut tree planted close to tomato plants will cause tomato wilt.  


Wood ash is great for your garden. Wood ash contains various nutrients like potassium, calcium and magnesium.  Cautions all good things should be used in moderations, excessive amounts could cause harm to your plants. 

Don’t use treated wood because of being toxic. So recycling your trees and repurposing it into a fertilizer for your garden.  

You can also make potassium hydroxide by soaking the wood ash in water to make soap. The craziest things that you can make all out of trees. 

Wood chips for smoking and preserving foods or even used for flavoring homemade whiskey. 

Sap that comes from pine trees also be used for glue and wood sealer.


Home


Shop Now


DIY Greenhouse

PVC Greenhouse
DIY PVC Greenhouse

Greenhouse Plans

Wrap this PVC DIY Greenhouse with plastic wrap in the early spring and then remove the plastic and cover the top with 50% sunshade protecting your plants from early ripening. 

Creating plans for a 12’x4′ greenhouse with PVC pipes is a practical and cost-effective way to extend your growing season. Here’s a basic guide:

Materials needed:

– PVC pipes (1″ in diameter)

– PVC connectors (elbows, tees, crosses, etc.)

– Greenhouse plastic, polyethylene film or sun protector tarp

– Ground stakes or rebar

– Zip ties or PVC adhesive


Steps:

1. Measure and mark the area where you want to build the greenhouse, ensuring it’s level and receives adequate sunlight.

2. Cut the PVC pipes to the required lengths using a PVC pipe cutter or a saw.

3. Assemble the PVC frame by connecting the pipes with the appropriate connectors to form the desired shape (rectangular in this case).

4. Secure the frame to the ground using stakes or rebar for stability, ensuring it’s firmly anchored.

5. Drape the greenhouse plastic over the frame, ensuring it covers the entire structure with some overhang for securing.

6. Secure the plastic to the frame using zip ties or by wrapping and securing it with PVC adhesive.

7. Install any additional features such as doors, vents, or shelves as needed.

8. Ensure there’s proper ventilation and access for watering and maintenance.


Simply measure your area that you want to have your greenhouse, making sure there’s enough sun coverage.  Then, start your plans.  This year I’m building a 12’ x 4’ Greenhouse and this what I need~

Using 1” diameter PVC pipe.

16-6’ PVC

2-4’ PVC

6-2’ PVC

Fittings using  1” diameter 

4- 3 way corner pieces 

8- Tees

3- Crosses


Instructions

Starting with the bottom frame.  Using 4 corners, 2 tees PVC fitting pieces, 2- 4’ and 4- 6’ PVC Pipes

Connecting 4’ pipe, corner fitting, 6’ pipe, tee fitting, 6’ pipe, corner fitting, 4’ pipe, corner fitting, 6’ pipe, tee fitting, 6’ pipe, corner fitting, 4 ‘ pipe.

Outside arch- Outside arch each one you’ll need 2- 6’ pipes, 2- 2’ pipes and 3 tee fittings,

Start by inserting a 6’ pipe into the frames corner fitting of the bottom frame. Pipe should be  facing upwards. Insert the tee fitting on the 6’ pipe. Sideways looking tee. Insert 2’ pipe,  insert tee sideways insert 2’, sideways tee, insert 6’ pipe then insert to the corner fitting.

Middle arch– 3 cross fittings, 2- 6’ pipes and 2- 2’ pipes.

Start by inserting a 6’ pipe into the fitting located on the middle frame. Insert cross fitting, insert 2’ pipe, insert cross fitting, insert 6’ into cross fitting and into the tee fitting already on the bottom frame. 
Cross bars- In this section there is 6- 6’ pipes.  We will be using 3- 6’ pipes then building the last arch and then connecting the next 3- 6’ pipes.  
Let’s build the last Outside Arch by repeating the first outside arch steps. 
Now, add the last three 6’ cross bars. 


You can visit our website for suggested products and supplies to build your very own Green house.

I’m am an Amazon affiliate and this website will earn a small portion of each sale.

PVC Greenhouse
DIY PVC Greenhouse Plans


Shop Now


Home


Green House ideas

Greenhouse shade

In this greenhouse we have a simple design made from PVC 12’x4’x6’ enough space for 12 tomato plants spaced 24” apart. Bucket gravity drip irrigation, rain barrow and a 50% sunblock shade tarp.

50% Sunshade

Sunshade Why? you ask, shade when your plants need lots of sun to grow. That’s true during the vegetation. When your tomatoes flowers start to fruit the Sun and heat can ripening your tomato’s early causing less yields and smaller fruits.

Gravity Drip Irrigation

Drip irrigation helps keep your foliage from getting wet during watering. Plus, helps keep tomato’s from splitting.  When the plants under watered the water comes from the tomato. 

Soaker Hose

Gravity Bucket

Rain Barrow

Rain barrows are a great way to provide non chlorine water during watering.  Why is this important?  Chlorine is in drinking water and will deplete the plants nutrients.  Then gives you water storage during droughts and saves money on the water bill. 

Landscape Material

Covering your garden with landscape material is a great way to keep your garden neat and clean.  Controls weeds and your plants will be more healthy. Why? Because your plants will be less likely to get blight or even mites from the dirt.

Row Covers

What are row covers? Row covers in gardening are protective coverings made of lightweight fabric or plastic that are placed directly over rows of plants in the garden. 

Pest Protection

Temperature Regulation

Moisture Retention

Wind Protection

Row covers should be securely anchored to prevent them from being blown away by strong winds.Overall, row covers are a versatile and effective tool for gardeners looking to protect their crops and optimize growing conditions.

Greenhouse Wrap

Greenhouse wrap, also known as greenhouse plastic or greenhouse film, is a covering material used to enclose the structure of a greenhouse. It is typically made of polyethylene, a type of plastic that is lightweight, flexible, and durable. Greenhouse wrap is a crucial component of greenhouse construction, providing protection, insulation, and optimal growing conditions for plants. It is a cost-effective solution for extending the growing season, protecting crops from adverse weather conditions, and creating a controlled environment for gardening and agriculture.

PVC Greenhouse
DIY PVC Greenhouse


Shop Now

I am an Amazon affiliate and this website earns a small portion from each sale


Spring has Sprung

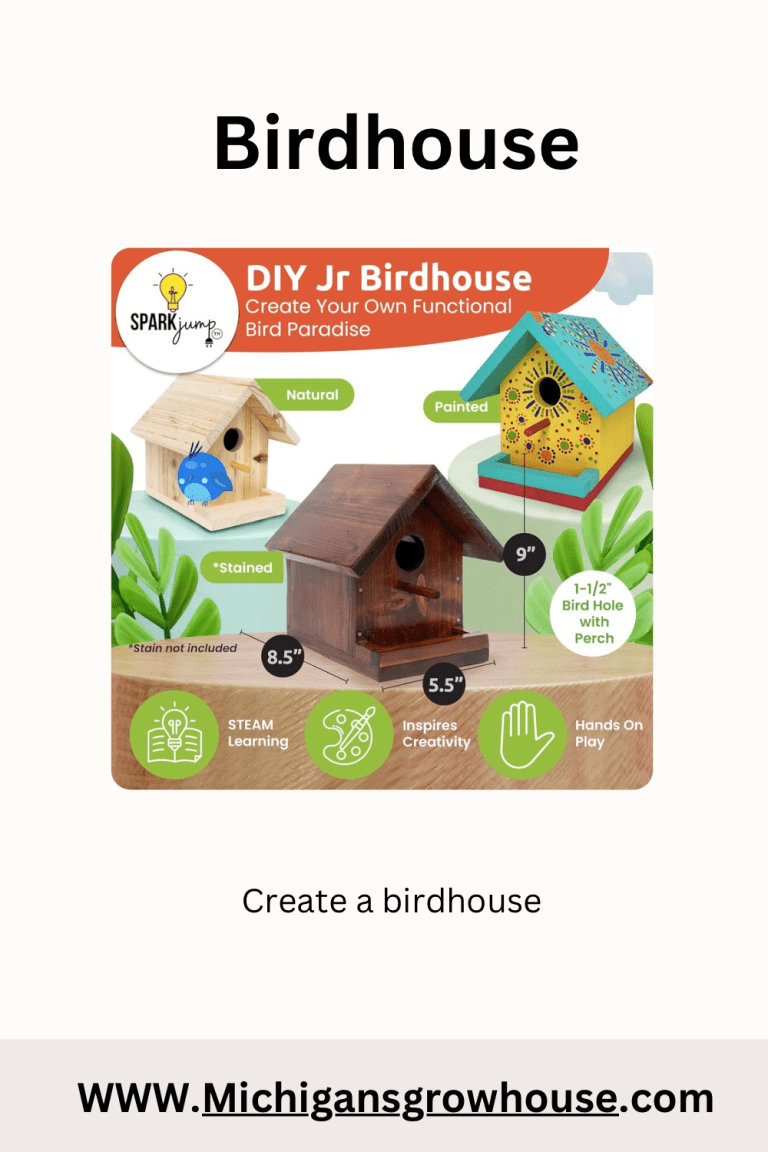
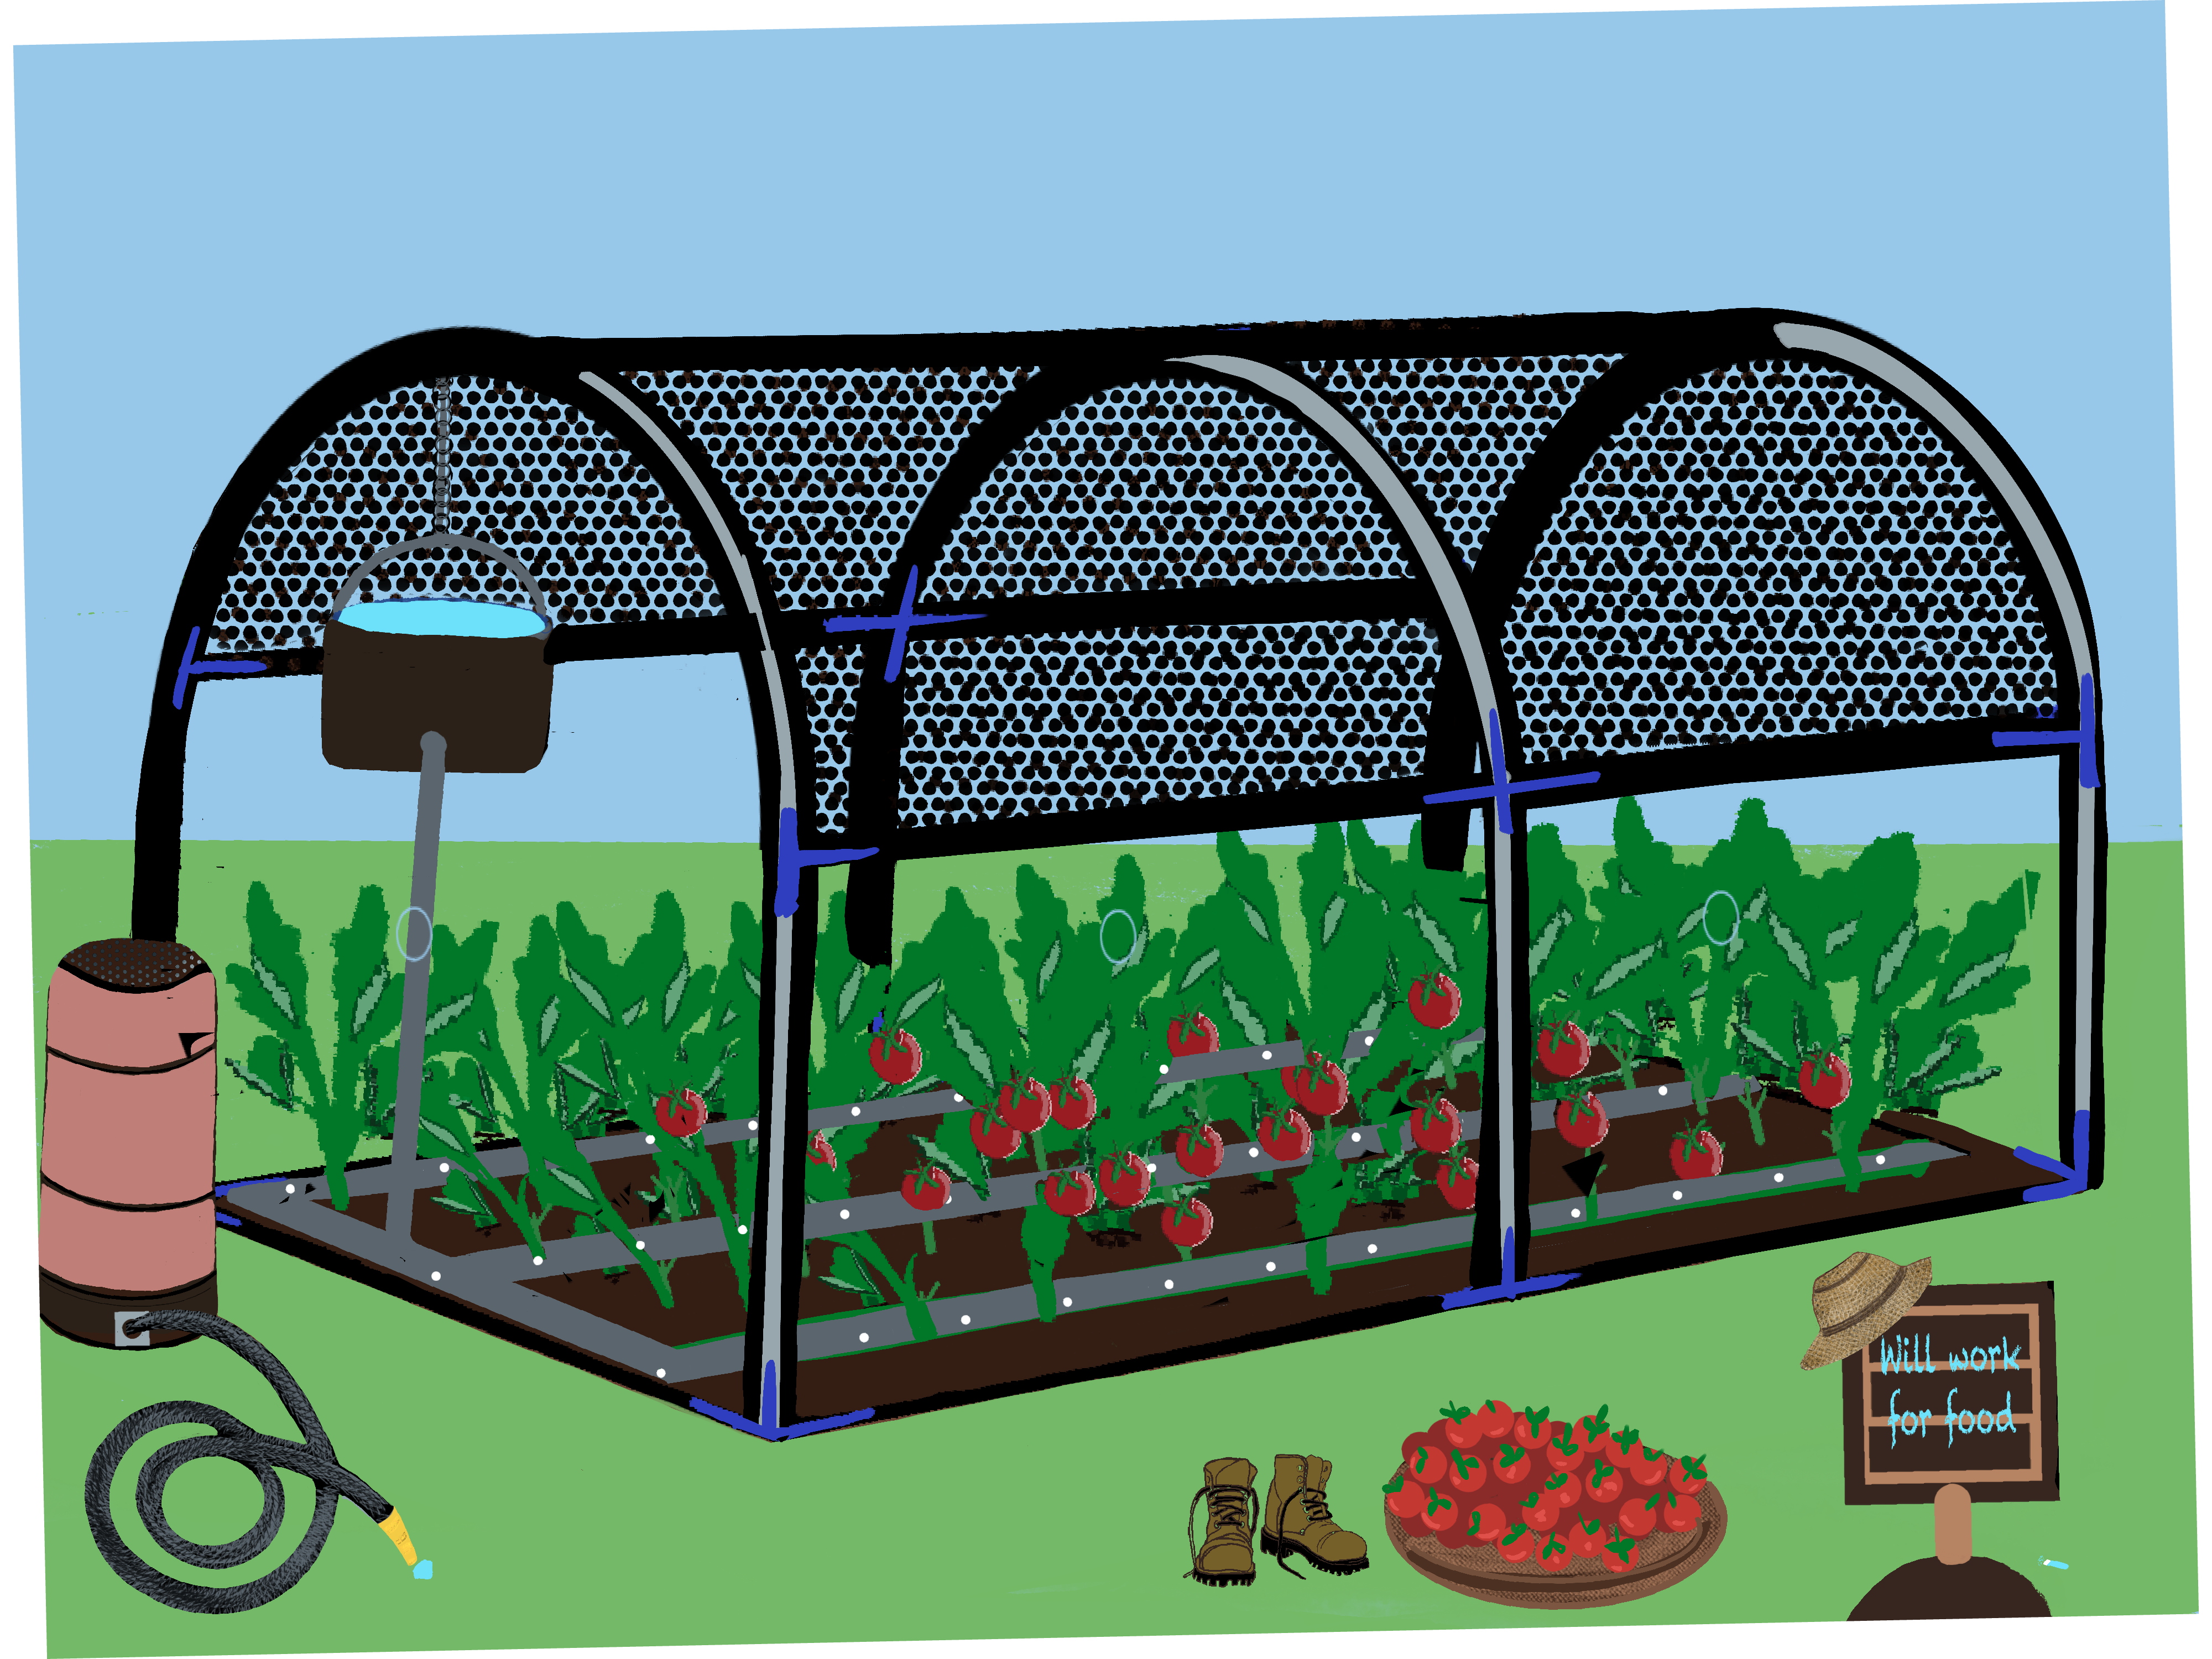
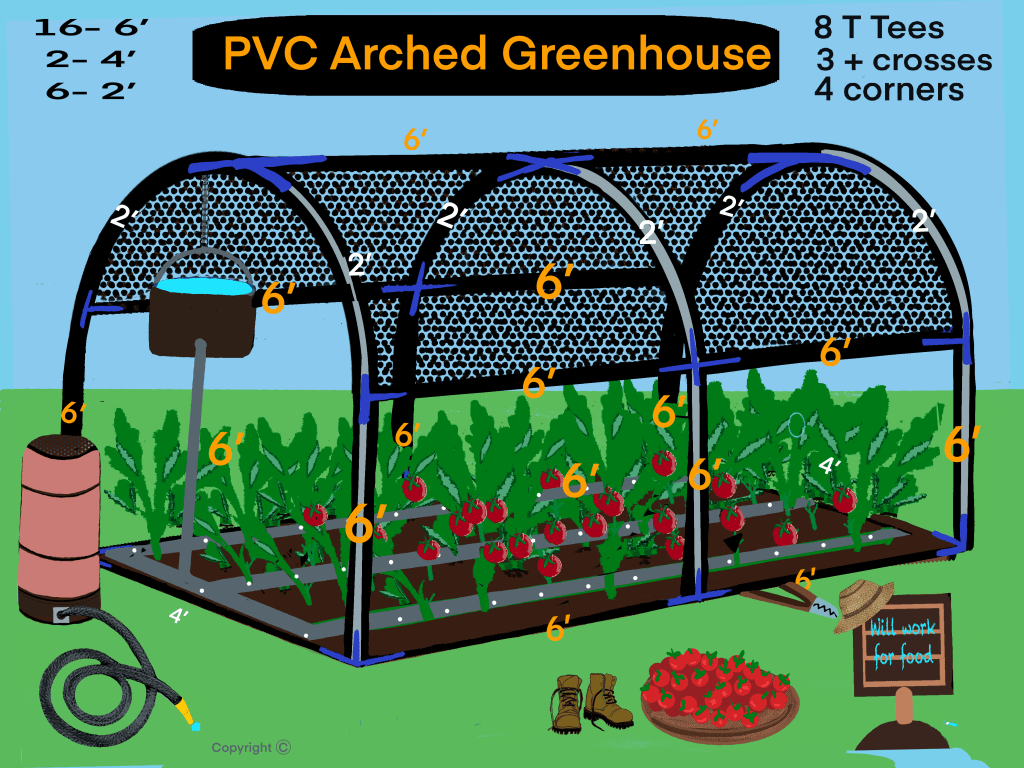
You’ve been thinking about starting your own vegetable garden to offset those rising cost of groceries. Learn some tips on gardening, gardening for beginners 

Cultivating your Dirt into Rich Soil

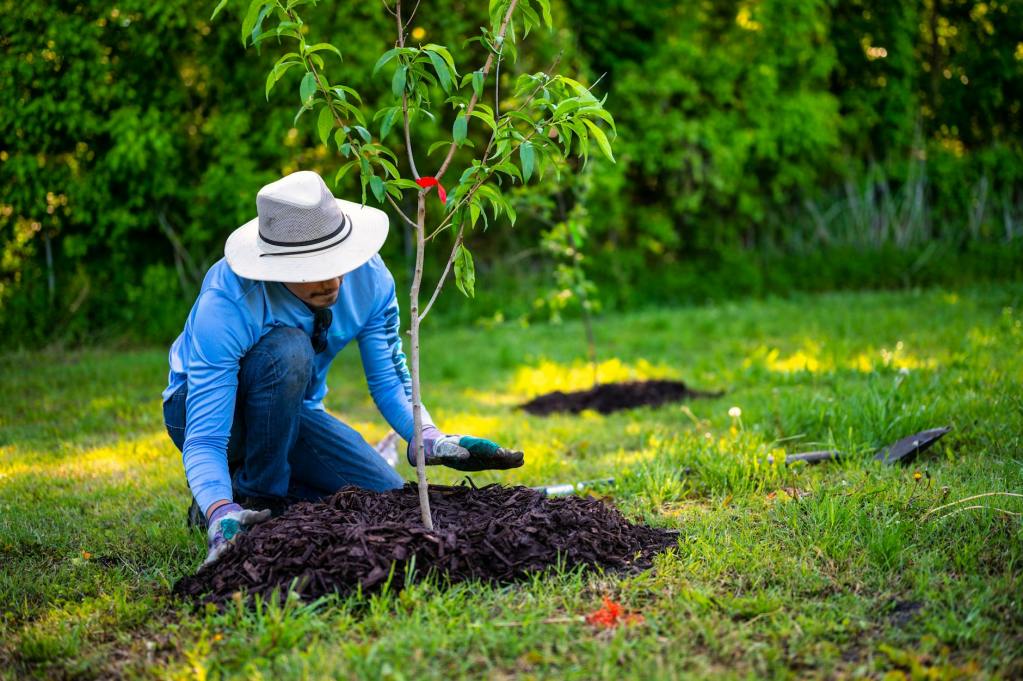
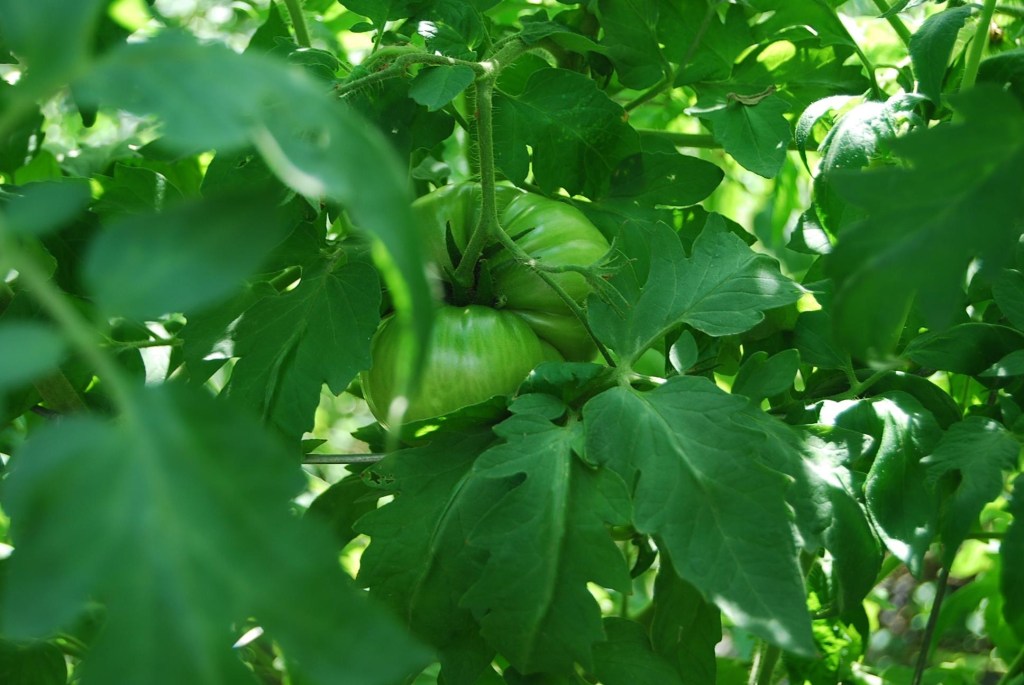
The best thing is when you can walk out your back door and grab some green beans, tomatoes, thyme etc.  One of my favorite memories of my Grandmother was helping her pick green beans for dinner that night. I would eat them as I picked them, wash, snap and steam them.  Really if you’ve never gardened before and you’re finding it harder to make ends meet then gardening could be for you. Then the flavor of the fresh grown vegetables from your garden is something that you can not buy from the store. 

A great garden all starts with your soil, so let’s start here.

Now what’s next? Here’s some ideas about mending your soil in the spring and in the fall for maintaining a healthy ecosystem.

Mending your soil in the spring and fall is essential for maintaining healthy, fertile ground for your plants. Here’s how you can do it.

Spring~ soil mending

If your soil is compacted, aerate it using a garden fork or a mechanical aerator. Aeration improves soil drainage and allows roots to penetrate deeper into the soil.

Soil testing

Based on the results of your soil test, amend the soil with additional nutrients as needed. This could include organic fertilizers, compost, or specific minerals to address deficiencies.

If you planted cover crops in the fall, turn them under into the soil in the spring before they go to seed. This adds organic matter and nutrients to the soil.

Remove any weeds that have emerged in the spring before they have a chance to compete with your plants for nutrients and water.

Apply a fresh layer of mulch to suppress weeds, conserve moisture, and regulate soil temperature throughout the growing season.

By following these steps in the spring and fall, you can mend your soil and create a fertile environment that promotes healthy plant growth.

Fall~ soil mending

Start by clearing away any debris such as fallen leaves, dead plants, or weeds from the soil surface. This allows for better air circulation and reduces the risk of pests and diseases over the winter.

Incorporate compost or well-rotted manure into the soil. Organic matter improves soil structure, provides essential nutrients for plants, and enhances water retention.

Consider planting cover crops such as clover or rye in the fall. These crops help prevent erosion, suppress weeds, and add organic matter to the soil when they’re turned under in the spring.

Fall is an excellent time to test your soil pH. Adjust the pH if necessary by adding lime to raise pH or sulfur to lower it. Proper pH levels ensure that plants can effectively absorb nutrients from the soil.

Apply a layer of mulch, such as straw or shredded leaves, to insulate the soil and protect it from erosion and temperature fluctuations during the winter months.

The nutrient uptake can be blocked if your soil isn’t maintained correctly. Have you ever wondered why your yields are less plentiful. Slowly turning the stem purple then killing the plant.
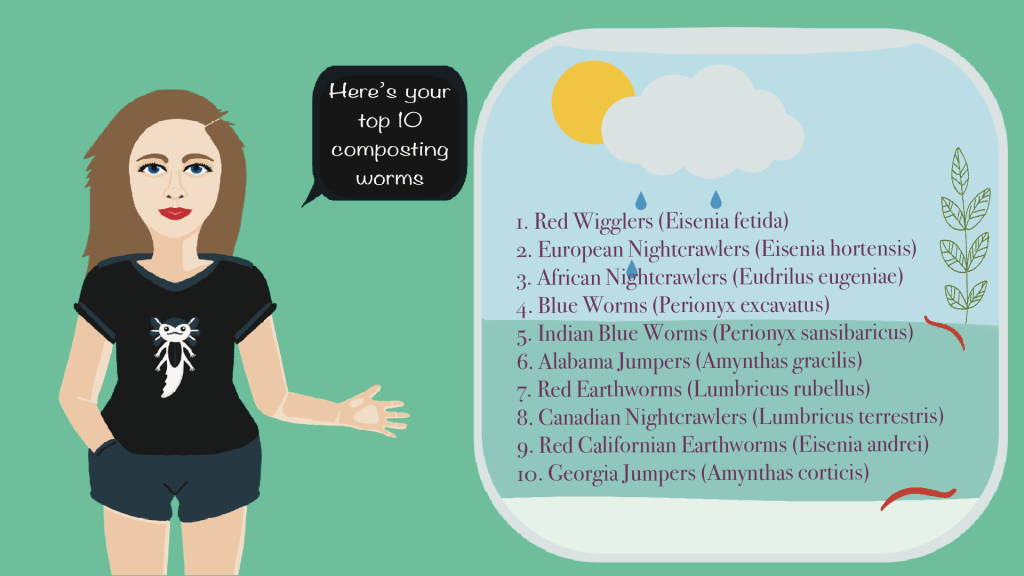
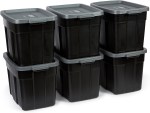
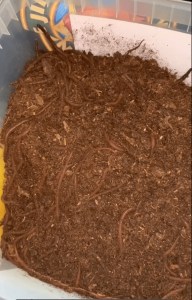
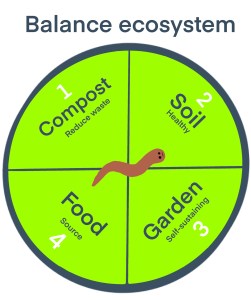
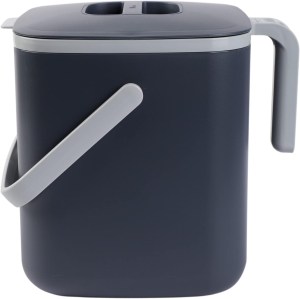
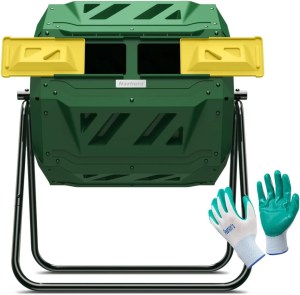
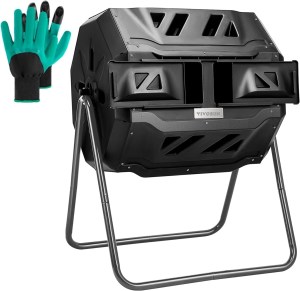
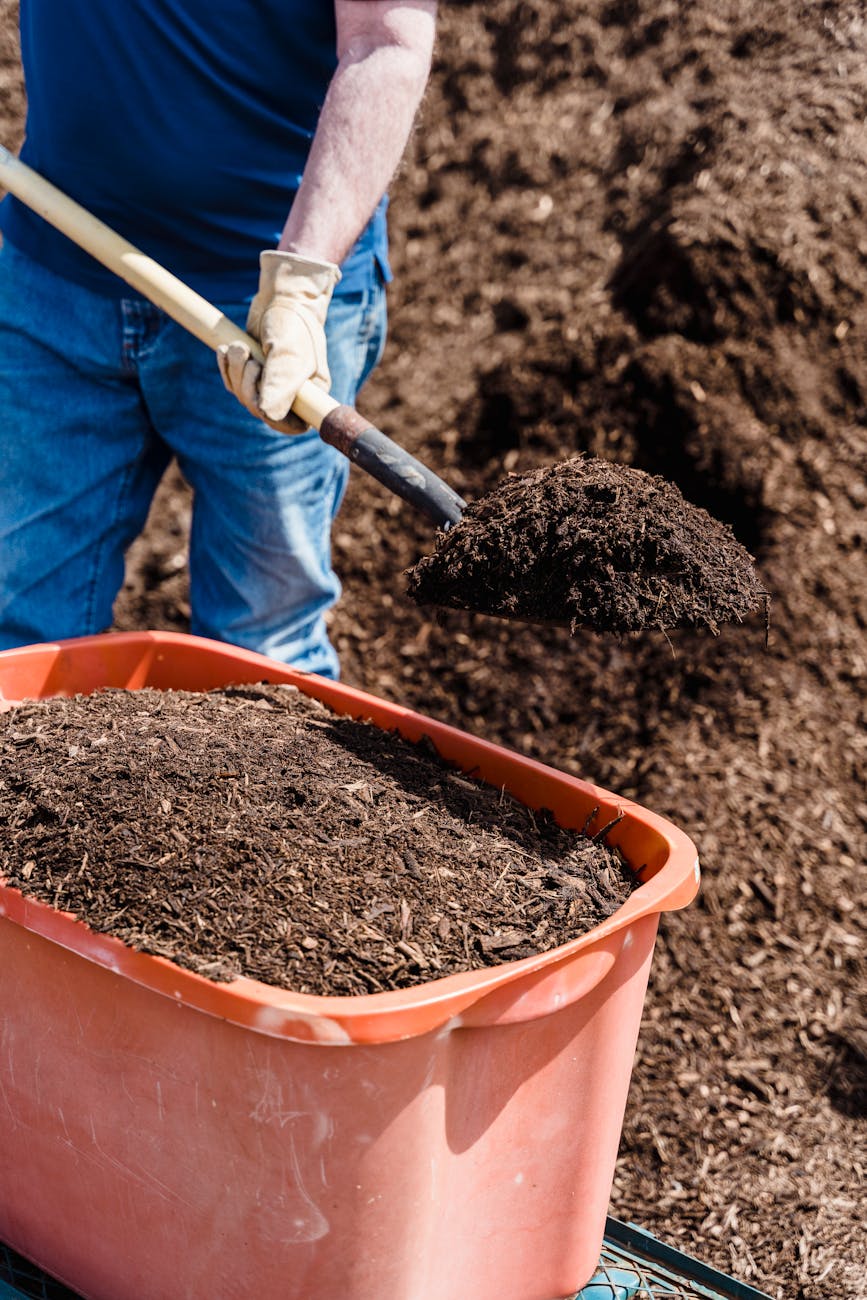
Composting

Consider composting your own food waste as well. Composting will give your gardening a great start to a healthy soil. Worms naturally aerate and amend your soil naturally. Delivers food to your yard or garden, nitrogen, phosphorus and potassium.

Potting soil or Raised garden recipe

Topsoil

Topsoil is rich in organic matter and nutrients, making it ideal for planting.

Compost

Adds essential nutrients, improves soil structure, and enhances moisture retention. You can make your own compost or purchase it from a garden center.
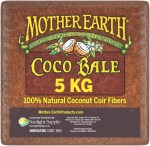
Peat Moss or Coco Coir

Helps improve soil texture, retains moisture, and adds organic matter. Choose peat moss or coco coir based on availability and environmental consideration.

Vermiculite  or Perlite

Improves soil drainage and aeration, preventing compaction and allowing roots to grow freely.

Manure

Provides additional nutrients and organic matter. Make sure it is well-rotted to avoid burning your plants. Fresh rabbit droppings can be used without burning plants.

Lime or Sulfur

Adjusts soil pH to the optimal range for plant growth. Test your soil pH first to determine if it needs adjusting.

Bone Meal

Supplies phosphorus, which is essential for root development and overall plant health.

Kelp Meal

Adds trace minerals and micronutrients that are beneficial for plant growth.

Instructions

Begin by mixing equal parts of topsoil and compost in a large container or wheelbarrow.

Add a 1:1 ratio of peat moss or coco coir to the mixture to improve soil texture and moisture retention.

Incorporate perlite or vermiculite into the mixture at a ratio of 1 part perlite/vermiculite to 3 parts soil mixture to improve drainage and aeration.

If using manure, add it sparingly to the mixture to avoid over-fertilizing. Aim for a ratio of 1 part manure to 5 parts soil mixture.

Adjust the soil pH as needed by adding lime to raise pH or sulfur to lower it. Follow the instructions on the packaging and retest the pH after a few weeks to ensure it is within the desired range.

Mix in bone meal at a ratio of 1 cup per square yard of soil mixture to supply phosphorus for plant growth.

kelp meal to provide trace minerals and micronutrients. Follow the recommended application rates on the packaging.

Thoroughly mix all the ingredients together until well combined.

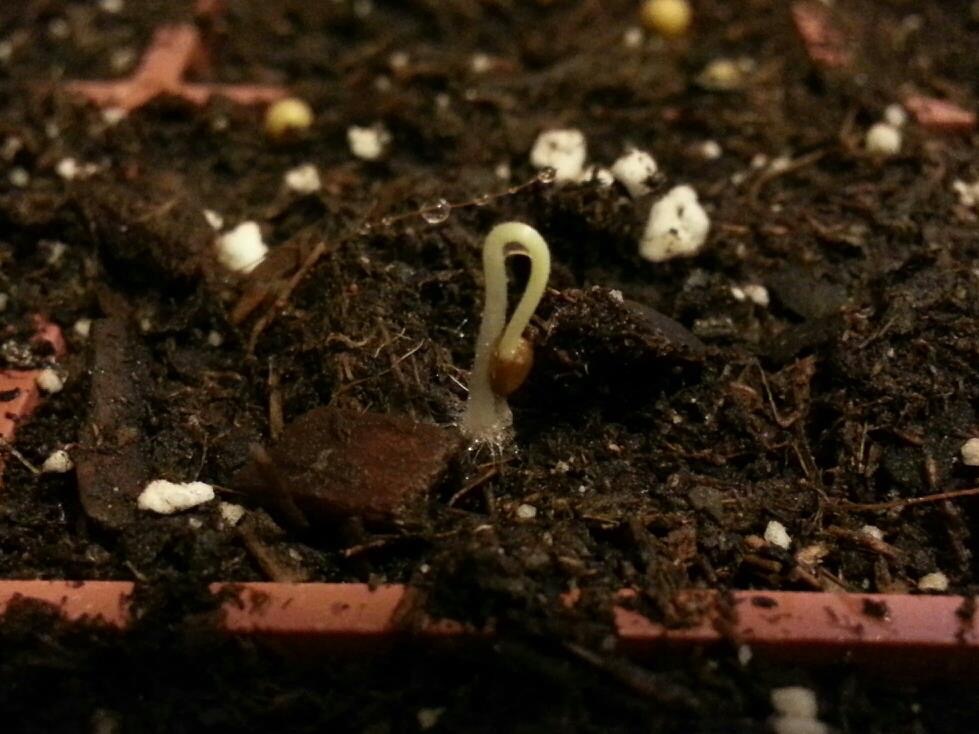
Making sure your soil is completely hydrated throughout prior to planting.

Your soil mixture is now ready to use for planting in containers, raised beds, or garden plots. Ensure proper drainage and watering practices for optimal plant growth.

Adjust the proportions of each ingredient based on your specific gardening needs and soil conditions. Experiment with different combinations to create the perfect soil recipe for your plants.


Michigansgrowhouse.com/Home


Home


Shop Now


Emergency essentials

I am a Amazon affiliate and this website earns a small portion of each sale.


Worm Reproductive System

Worms, worms and more worms. That’s right worms multiply within one month, one worm can become four worms. Worms are essential in our ecosystem by digesting decaying foods turning it into microorganisms. In other words, turning bad bacteria into good bacteria.

Let’s dive right into it, it’s super simple and straight forward. Worms are hermaphrodites they have both male and female parts. Even though it takes two worms to reproduce.

Worm anatomy typically consists of a simple body plan, including a head, a tail, and a segmented body. They usually lack limbs, have no back bone, have soft, elongated bodies, and may have bristles or setae for movement. Internal organs vary depending on the species but generally include a digestive system, nervous system, reproductive organs, and sometimes a circulatory system.

  1. Head: This is where the worm’s mouth is located. It’s where they eat food.
  2. Body Segments: Worms have many segments along their bodies, which help them move and wriggle around.
  3. Skin: Worms have soft, smooth skin that helps them move through soil easily.
  4. Setae or Bristles: These tiny hairs on the worm’s body help them grip and move through the soil.
  5. Digestive System: Inside the worm’s body, there’s a simple digestive system that breaks down food.
  6. Nervous System: Worms have a simple nervous system that helps them sense their environment.
  7. Reproductive Organs: Depending on the type of worm, they may have reproductive organs to make babies.

Remember, worms are fascinating creatures that play an important role in our ecosystem that helps keep the earth beautiful.

Fun fact: if you didn’t already know that a worm is an animal and not a bug.

Learn more about composting worms hands on through terrarium, science or composting kits. Checkout these here


Living Soil Benefits

Living soil is a vibrant ecosystem teeming with microorganisms, fungi, insects, and worms, all working together to support plant growth. Let’s explain

Living soil offers a range of benefits for plant growth, soil health, and environmental sustainability. Some of the key benefits include, improved soil structure, nutrient-rich soil, enhanced water retention, increased soil microbial activity, reduced need for chemical inputs, carbon sequestration, improved plant health, resilience and support for biodiversity.

Overall, the benefits of living soil extend beyond plant growth to encompass soil health, environmental sustainability, and ecosystem resilience, making it a cornerstone of regenerative agriculture and sustainable land management practices.

Living soil is rich in organic matter, which enhances soil structure by promoting aggregation and the formation of stable soil aggregates. This improves soil aeration, water infiltration, and root penetration, leading to healthier plant growth.

The presence of beneficial microorganisms in living soil helps break down organic matter into nutrients that are readily available to plants. This natural nutrient cycling results in a fertile soil environment that supports vigorous plant growth and reduces the need for synthetic fertilizers.

Organic matter in living soil acts like a sponge, holding moisture and improving water retention in the soil. This reduces water runoff and erosion, while also ensuring plants have access to water during dry periods.

Living soil is teeming with beneficial bacteria, fungi, and other microorganisms that play essential roles in nutrient cycling, disease suppression, and soil structure improvement. These microbes help decompose organic matter, fix nitrogen, and protect plants from pathogens, contributing to overall soil health.

By promoting natural processes such as nutrient cycling and pest management, living soil reduces the reliance on synthetic fertilizers, pesticides, and herbicides. This not only saves money but also minimizes environmental pollution and reduces the risk of soil degradation.

Healthy living soil acts as a carbon sink, storing carbon from organic matter and atmospheric carbon dioxide in the soil. This helps mitigate climate change by reducing greenhouse gas emissions and improving soil fertility.

Plants grown in living soil tend to be healthier and more resilient to environmental stresses such as drought, disease, and pests. This is due to the balanced nutrient availability, beneficial microbial interactions, and enhanced root development facilitated by living soil.

Living soil provides habitat and food sources for a diverse range of soil organisms, from earthworms to beneficial insects. This biodiversity contributes to ecosystem resilience and supports healthy ecosystems above and below ground.

DIY learn how to make a worm bin built in minutes and on a budget.

DIY worm bin


Top 10 Composting Worms

Worms have this amazing ability to turn decomposing materials into a powerful organic fertilizer.

Here are ten types of composting worms commonly used for vermicomposting:

It’s essential to choose the species that best fits your composting setup and environmental conditions. There is between 7000-9000 species of earthworms, but only a handful are good for composting.

1 Red Wigglers (Eisenia fetida)

Perhaps the most widely recognized composting worm, red wigglers are prized for their voracious appetite and rapid reproduction rate. These small, reddish-brown worms thrive in a variety of conditions and can consume their body weight in organic matter daily. Red wigglers are well-suited for household vermicomposting systems and are commonly found in worm bins and compost heaps around the world. 

2 European Nightcrawlers (Eisenia hortensis)

Are larger and more robust than red wigglers, making them popular choices for larger-scale vermicomposting operations. These worms are capable of processing significant amounts of organic waste and are particularly well-adapted to cooler temperatures. European nightcrawlers are prized for their resilience and are often used in commercial composting facilities.

3 African Nightcrawlers (Eudrilus eugeniae)

Are well-suited for warm, humid environments. These large, robust worms are voracious eaters and can process large quantities of organic matter quickly. African nightcrawlers are popular choices for composting in subtropical and tropical regions, where they thrive in outdoor compost piles and worm farms.

4 Blue Worms (Perionyx excavatus)

Are particularly well-suited for vermicomposting in tropical climates, where they can help break down organic waste in outdoor bins and compost heaps.

5 Indian Blue Worms (Perionyx sansibaricus)

Are efficient decomposers, processing various organic materials into nutrient-rich castings ideal for soil enrichment. They thrive in warm and humid environments, making them well-suited for composting in tropical climates. Prolific breeders, they reproduce through clitellum mating and can rapidly multiply under optimal conditions. Indian Blue worms are valuable allies in vermicomposting, contributing to sustainable waste management and healthier soils.

6 Alabama Jumpers (Amynthas gracilis)

Are deep-burrowing earthworms, often found in the soil rather than surface layers. They are highly efficient at aerating and improving soil structure due to their extensive burrowing activity. Alabama Jumpers are known for their ability to “jump” when disturbed, retracting quickly into their burrows. They are commonly used in soil improvement projects and vermiculture operations, particularly in agricultural settings.

7 Red Earthworms (Lumbricus rubellus)

Are voracious decomposers, feeding on organic matter such as dead plant material, leaf litter, and decaying organic debris in the soil. They play a vital role in soil health by breaking down organic matter and creating nutrient-rich castings that enrich the soil with essential nutrients. Red earthworms are often used in vermiculture and composting systems to accelerate the decomposition process and produce high-quality compost for gardening and agriculture.

8 Canadian Nightcrawlers (Lumbricus terrestris)

While not traditionally used for vermicomposting, Canadian nightcrawlers are worth mentioning for their significant role in soil health and fertility. These large, earthworms are prized for their burrowing abilities and are commonly found in garden soil and compost piles. While Canadian nightcrawlers may not be as efficient at processing organic waste as their smaller counterparts, they still play a valuable role in aerating and enriching the soil.

9 Red Californian Earthworms (Eisenia andrei)

Are highly efficient decomposers, thriving in organic-rich environments such as compost piles, worm bins, and garden soil. They consume a wide variety of organic materials, including kitchen scraps, yard waste, and paper products, converting them into nutrient-rich castings that benefit soil health. Like other composting worms, Red Californian earthworms play a vital role in vermicomposting, helping to break down organic matter and create valuable compost for gardening and agriculture.

10 Georgia Jumpers (Amynthas corticis)

are a type of earthworm known for their large size, active behavior, and ability to aerate soil effectively. They are often used in vermiculture and organic gardening due to their efficiency in composting and improving soil structure.

Visit us at Michigansgrowhouse.com for more information about composting.


DIY Worm Chow

Worm chow

DIY Worm Chow Recipes

Complete Balance Diet 

This recipe provides a balanced diet for worms and can help support their health and reproduction. Adjust the ingredients as needed based on the specific needs of your worm colony.

Ingredients:

– 1 part ground oatmeal or rolled oats
– 1 part ground cornmeal
– 1 part ground wheat bran or wheat germ
– 1 part ground dried leaves or leaf litter
– 1 part ground dried fruits and vegetables (like carrots, apples, or squash)

Instructions:
1. Grind all the ingredients separately into fine powders using a blender or food processor.
2. Mix all the powdered ingredients together in a large bowl until well combined.
3. Store the worm chow in an airtight container in a cool, dry place until ready to use.
4. Feed the worm chow to your worms in moderation, ensuring it is not too wet or too dry.

2nd Worm Chow Recipe

Nutritious Mix

This recipe provides a nutritious mix of ingredients that can help support the health and vitality of your worm colony. Adjust the proportions as needed based on the size and needs of your worm population.

Ingredients:

– 1 part almond flour

– 1 part chickpea flour

– 1 part rolled oats

– 1 part ground dried leaves or leaf litter (optional for additional nutrients)

– Small amount of ground eggshells or crushed oyster shells for calcium (optional)

Instructions:

1. Combine the almond flour, chickpea flour, rolled oats, and ground dried leaves or leaf litter in a bowl.

2. Mix the ingredients thoroughly until well combined.

3. Optionally, add a small amount of ground eggshells or crushed oyster shells to provide calcium for your worms. This is especially important if your worms are breeding.

4. Store the worm chow in an airtight container in a cool, dry place until ready to use.

5. Feed the worm chow to your worms in moderation, ensuring it is not too wet or too dry.


DIY Two Layer Worm Bin

DIY Two layer worm bin

Creating a DIY two-layer worm bin is a great way to compost kitchen scraps and produce nutrient-rich worm castings for your garden. Here’s a guide to making your own worm bin.

materials and Products page

Materials needed:
1. Two plastic storage bins with one lid
2. Drill with a 1/8-inch & 3/8-inch drill bits
3. Cardboard liner
4. Bricks or blocks for elevation 
5. Worm bedding materials (shredded newspaper, cardboard, Coconut coir
6. Red wormsEisenia fetida or Eisenia andrei
7. Catch tray 

Instructions:

1. Start by drilling multiple small holes in the bottom of one of the storage bins for drainage and aeration. Space the holes evenly across the bottom.

2. Next, drill several holes around the upper edges of the same bin for ventilation. These holes will allow air to flow into the bin.

3. Place the bin with holes inside the second bin without holes. This will serve as the bottom layer of your worm bin. Drill one 1/8” hole through the stacked bins for drainage either on the bottom if it’s a raised bin or on the side.

Let’s make worm bin

4. Elevate the bottom of your bins slightly by using bricks or blocks to allow excess moisture to drain freely in a catch tray.

5. Cut a piece of cardboard or landscape fabric to fit inside the bottom bin. This will prevent worms and bedding material from falling through the drainage holes.

6. Prepare bedding material by moistening shredded newspaper, cardboard, or coconut coir until it’s damp but not soaking wet.

7. Add the bedding material to the bottom bin until it’s about halfway full.

8. Introduce your red worms to the bedding material. Start with a small amount and allow them to burrow into the bedding.

9. Place kitchen scraps on top of the bedding material. Avoid adding meat, dairy, oily foods, and citrus fruits as they can attract pests or harm the worms.

10. Cover the kitchen scraps with additional bedding material to help control odor and discourage pests.

11. Place the lid on the stacked bins to keep pests out and maintain moisture levels.

12. As the worms consume the food and bedding, add more scraps and bedding material as needed. Over time, the worms will produce nutrient-rich castings that can be harvested and used as fertilizer for your plants.

Remember to monitor the moisture levels and adjust bedding material as needed to keep the worms happy and healthy. Enjoy your DIY two-layer worm bin and the benefits of vermicomposting!


The Little Potato Grow Bag

You think that the prices of groceries are out of control learn how to eat for less or even free…

Harvesting potatoes

Gardening brings lots of family fun, hobbies, memories and a savings on your wallet.

Potatoes are easy to grow rather if you have a garden or just using pots, buckets or even barrels. It’s best to start off growing potatoes by putting a small amount of dirt at the bottom of your pot or bucket and then your potato starters, slightly cover with dirt. When you see it sprout, add more dirt until it’s covered and keep repeating the process. Growing time is 12 – 20 weeks long. One potato yields a whopping 5 – 20 potato’s and likes to be grown in the full Sun.

Remarkably, when you see the plant flowering is when your potatoes are growing down beneath the plant.

This one potato yield 15 potatoes

Potatoes are enriched with potassium, protein vitamins, A B,C, magnesium, and iron.

Then, by me simply taking our potato scraps to our compost bin, we now already have this year’s potato crop growing.

One of the best things that we’ve done and that is composting with red wigglers. You are taking what you would normally throw away and turn it into the very best fertilizer around. Worm castings or even its liquid run off. Vermicomposting is full of microorganisms and is essential for a healthy roots system and stem strength.

Storage

Just like squash, potatoes have a long self life if stored in a cool, dry and dark space after harvesting. One other option is to blanch and freeze and they last up to one year in the freezer.

10 Gallon potato bags breathable fabric pots BPA free reusable year after year.


DIY Worm Bin

Making sure your room isn’t too hot or too cold. That’s right your worms are sensitive to a few things. A successful composting bin is providing a comfortable atmosphere for your worms. So, I put together a step by step guide.

Some Nutrients and micronutrients that are in Worm Castings

Do’s and Dont’s

No chlorinated water

Not to dry and not to moist.

Don’t over or under feed.

No meat, dairy, onions or high acid vegetables or fruits.

Feed worms-

Cardboard and paper with no colored ink.

Coffee grounds, eggshells, watermelon rinds, potatoes and peels and leafy lettuce, you get the point.

DIY Worm Bin

You can use plastic totes as a compost bin by stacking 3 bins

and using 1 lid.

Drilling holes on the bottom of 2 bin layers leaving the bottom layer undrilled. Providing enough efficient air by drilling all along the lid and all around the top edge.

Drilling one drain hole close to the bottom.

Now, you will need a catch tray, coco and some red wigglers.

Thermometer
Thermometer

6, 18 gallons Rubbermaid totes
6, 18 gallon Rubbermaid tote

Thermometer
Coco bale
Coco bale

Water meter
Coco
Coco brick

Ryobi drill set
Ryobi drill set
Thermometer

Black and Decker drill
Composting red wrigglers
Red wigglers

6, 10 gallon Rubbermaid tote
Worm food

If your bin PH is off or something else the worms will try to escape. Adding a light over the top will prevent them from escaping why because they are light sensitive. Always take care of any problems.

Check to see If the drainage isn’t blocked. Biggest problem is that there’s not enough oxygen.

If you have a sour smell add shredded cardboard or paper.

Your worm bin population will muiltiply by 2 approximately every 60 days. So if you were thinking of having a worm farm or feeding your axolotl’s

Bin temperatures should be between 55f -80f

Fun fact-

What is a worm, is it a bug, snake or an animal?

Answer: Animal

Red wigglers
Red Wigglers

I’m a Amozon Affiliate where this website earns a small

portion of each sale.


Composting and worm castings

Worm casting is a great natural fertilizer and is easy to obtain. If you have a worm bin and you’re composting your own food waste, you are already on your way to making your own natural fertilizers.

Worm castings contain five times more nitrogen content can soar to 7.37%, nitrogen, seven times more phosphorus, and phosphorus can be a whopping 19.58%. 11 times more potassium than ordinary soil.

A nutrient-rich liquid fertilizer full of beneficial microorganisms. Environmentally friendly and a natural pest suppression.

Worm tea recipe

Equipment:

5 gallon bucket

Measuring cup

Measuring spoon

Cheese cloth or steeping bag

Aerator- air-stone / air pump

Ingredients:

5 gallons non chlorinated water

2 Tbsp. Black strap unsulfered molasses.

1 cup worm castings

Directions:

5 gallons of non chlorinated water, mix 2 Tbsp. of unsulfered molasses and add the aerator/ bubbler.

Using a steeping bag add 1 cup of worm castings to the bag and add the closed bag to the bucket of water.

Aerate the mixture for 24 to 48 hours making sure that it’s used with in a few hours for maximum benefits.

Dilute prior to using 1:10 ratio using non chlorinated water

Example: 1/2 gallon tea to 4 1/2 gallons water.

Yields: 50 gallons. Mix 5 gallons tea to 50 gallon non chlorinated water

Tip~ This is how you get non chlorinated water. Take tap water and let it sit in buckets for 6 -12 hours and the chlorine evaporates naturally.

Diluted worm tea also can be used for foliar spray and creates stronger stems and more foliage.

5 gallon buckets

100 ft hydroponic air pump tubing
100 ft air pump tubing

Air stone
Air stone

Sprayer
Sprayer

Steeping bags
Steeping bags

Worm bin
Worm bin

I am a Amazon affiliate and this website

earns a small portion of each sale.

DIY worm bin

You can also use plastic bins as a compost bin by stacking 3 bins and 1 lid. Drilling holes on the bottom of 2 bin layers leaving the bottom layer undrilled. Providing enough efficient air by drilling all along the lid and all around the top edge. Drilling one drain hole close to the bottom. Now you will need a catch tray, coco and some red wrigglers.

Plastic bins
Plastic bins


Harvesting rain water

Rain Barrels

Are a great way to control where the water flows in your yard. Rain barrels are used to collect the rain and recycle it throughout your eco-friendly gardens.

Why collect rain? you ask.

Conserves water and save money on your water bill.

Can be used as a reservoir for water shortages and is naturally a soft water. Is a healthy alternative source for watering your grass and your garden.

Is a great way to brew compost tea. Making a compost tea for your garden improves soil health and promotes microorganisms turning bad bacteria into good bacteria. Creating (energy) photosynthesis and microbes for your self-sustaining garden.

Then if you are a soap maker it can be used to make soap.

I also keep a 3-5 day rule with standing water and that it must be used within 3-5 days. Otherwise it becomes stagnant and unusable. You could also just add an air bubbler to your barrel so that the water doesn’t become stagnant.

Oh, course this is not a drinking water unless you distilled it. All barrels should made from a food grade type of materials too.

Barrels can be raised above the ground for a faster flow almost emptying your barrel completely with a stand. Then, just connect a hose to the spout and wash your car.

Keeping your rain barrel clean regularly is also important making sure there is no debris. This requires a sponge and soap and then completely rinse all the soap out. Don’t forget to empty prior to freezing weather to prevent cracking.

Plus you want to keep a cover over it to keep bugs, animals and debris out of the barrel.

Rain barrel 55 gallon Black, plastic
UpCycle 55 gallon rain barrel

Terra Cotta 55 gallon rain Barrel made from high-density polyethylene (HDPE). rain barrels are containers that collect and store rainwater draining from your roof. It provides an ample supply of free soft water” that contains no chlorine, Lime or calcium for gardens, flower pots, and car and window washing. Rain barrels are assembled with a Spigot & overflow fitting. The rain Barrel top/lid is equipped with metal mesh screen to filter out debris and prevent mosquitoes from getting in.

Terra Cotta rain barrel 55 gallons
UpCycle rain barrel

Your solution to our emerging water shortage–collect rainwater When drought sets in and rain is short, rain barrels can provide that precious water you need for your lawn and garden. This rain barrel can provide up to 50 gallons of water. During heavy rain falls, a typical roof can produce hundreds of gallons. With those kinds of savings, this rain barrel can pay for itself.

50 gallon Rain Barrel with stand
Black eco rain barrel with stand

Rain Barrels to Collect Rainwater from Gutter – Rain Collection Barrel Water Barrel Rainwater Collection System Collapsible Rain Barrel Include Filter Two Spigots and Overflow Kit (53 Gallon, Black)

Collapsible rain barrel 3 gallons black
Collapsible rain barrel 53 gallons black
Giraffe hybrid garden hose
Giraffe hybrid garden hose with shut off valve

Giraffe Hybrid Garden Hose 5/8″ x 50ft, Brass Male and Female Fittings with Shut off Valve, Flexible, Heavy Duty, Leakproof Water Hose.

Screen cover
4 pcs mesh cover with draw strings

4 Pcs Mesh Cover for Rain Barrels – Rain Barrel Net Cover with Drawstring Rain Barrel Netting Screen for Preventing Fallen Leaves Debris and Small Objects. – 39in (not needed with rain barrels above)

I am an Amazon affiliate where this website gets a small portion of each sale through each sale.


Welcome

Gardening season is right around the corner.

Seedling

Knowing when to germinate

Let’s begin here because this is the beginning of the plants life.

I know that it’s winter and you started to get the urge to germinate some seeds. The best time to germinate is 6-4 weeks prior to planting outdoors.

In nature plants react to the sunlight so if there’s 6-8 hours of direct sunlight this will provide enough to create photosynthesis. A good indication is when you start to notice that the days are getting longer.

Late march is a good time to start gathering your materials such as seed starter heating pad, trays, lights, starter dirt and buying seeds.

Vivosun
Green house and seedling heat mat

Plant the seeds about 1/4 inch deep spacing them. Keep moist and in the dark until sprouted then provide with a grow light about 16 hours or even 24 hours. Making sure that you mark each type with a label.

Once the seedling has grown a few set of leaves it’ll be time to carefully transplant into another pot.

Root system

Making sure your plant has a great root system is priority. Healthy roots, plant and awesome yields.

I like to use a material type pot why? because the root system won’t swirl and choke themselves out plus of the oxogen supply better.

Smart pots
Smart pots

In my house we have a large composting bin so all winter I am making black gold. Earth worms are producing worm castings (poop) and are the beneficial bacteria for micronutrients needed as an excellent source of fertilizers for the beginning of vegetation that promotes healthy foliage.

Not to mention I’m feeding our axolotls (salamanders) worms.

Worms

For the most part worms are easy to take care of. Theres only a couple of things to remember. Don’t over water and don’t let the bin dry out, feed them at least once a week and temperatures not too hot and not too cold. The temperatures should be between 55-77.

Smelly bin add some shredded newspaper, cardboard, or egg cartons. This will reduce any bad order. Make sure your bin can drain also.

For your convenience I added a few links to products and I am an Amazon affiliate where this website will be earning a small portion of the sale.

Keep an eye for any bug activity such as mites. Sprinkle in some diatomaceous earth. Don’t over feed or over water. When feeding your worm the food should be buried.

Diatomaceous earth


Urban gardening

Gardening at it’s best

Why have a garden? Today, the best quality foods are gonna be grown right in your own back yard. Then, you’ll notice the flavor of your vegetables immediately. No one can even explain the difference.

You are in control, either you can grow organically or chemically, the choice is yours. Start here with composting your own waste.

Composting

Composting your own waste has several benefit factors. Theres a lot of reasons why, one you’re creating your own fertilizers. Contains Nitrogen, phosphorus, potassium, micronutrients and beneficial bacteria that is essential for having a healthy garden or even a living soil. What’s even better is you’re completing a circle. Saving money, using your own waste instead of just adding it to a landfill. Then, did I happen to mention that beautifying your yard, feeding your garden, supplying healthier vegetables to your table and possibly feeding your axolotl. All with items that you would typically just throw away.

Items that you can feed to your compost bins. Making it safe for your red wigglers. Yes I said red wigglers.

No meat or high acid items. Using non chlorine water. How do you get non chlorine water you ask you simply fill a bucket with water and let it sit. So it would be safe to use within 6 hours what happens is that the chlorine evaporates.

You can also pick up free coffee grounds at your local coffee shop.

1. Coffee grounds benefits are that it repels bugs, balances the PH in your soil and is high in nitrogen.

2. Eggshells also helps with bugs and is a great source of calcium.

3. Potato peels is a huge source of potassium.

4. Grass clippings high in nitrogen. Outdoor bins only

Some gardeners will simply add grass clippings around the base of the plants.

Watermelon rinds are also a great addition to feeding your worms. Worms are needed to break down your scraps into a compost. This is known as the very best fertilizer around called vermicomposting.

You also want to start your composting bin with a non fertilized coco or soil. Worms also like warm blankets

Urban Worm BlanketUrban worm blanket

For your convenience I added a few links to products. I am an Amazon affiliate where this blog will be earning a small portion of the sale.

Reducing your waste through composting year around with this compacted size compost bin. The education that you and your family will receive on being able to reduce your over all waste footprint will be satisfying.

https://amzn.to/Ginkgo kitchen compost bin

Ginkgo kitchen compost bin for food scrap waste

Ginkgo kitchen compost bin

Outdoor compost tumbler designed for composting during the summer. Where you are taking your waste and turning it back into food for your yard or garden.

CompostTumbler Bin

Vivosun outdoor Tumbling compost bin is another great choice for composting and is less noticeable in your yard because of the color.

All composting bins should be stored in the shade.

Vivosun outdoor Tumbling Composter
Vivosun Outdoor Tumbling Composter Dual Rotating Batch 43 Gallon


How to Freeze Blueberries

Okay, one might say why? Why? Should I learn how to freeze blueberries. It really should be easy as rinse, bag and freeze them, right? 

So, if you were to freeze the blueberries just like that you wouldn’t be able to scoop out just 1 cup at a time.  What you would end up with is one solid chunk of blueberries and you wouldn’t be able to throw a few in your yogurt or oatmeal.

You’ll all will need some paper towel, a colander, a couple of cookie sheets and a whole lot of blueberries.

Let’s get started with some of your freshly picked blueberries.
Place the colander into the sink and put the blueberries right in the colander and rinse the blueberries with cold water. This is where you will start to notice the soft or damaged ones, just simply remove them.

Freeze Blueberries
Freeze Blueberries

Next let’s prepare our cookie sheets by lining them with paper towels. Gently shake the colander and blueberries to remove most of the water. Now, lets place a single layer of blueberries on your lined cookie sheet.

Now simply put the whole cookie sheet into the freezer and freeze your blueberries for approximately 3 hours.  Remove from the freezer and put the blueberries into a freezer bag this is where I like to put the date right on the freezer bag.  With a freezer maker or permeant marker.

freeze blueberries
How to freeze blueberries

Freezer Shelf Life

1 year is the general rule for freezing food after that it’s time to clean that freezer out.My preference is 6 month really for freshness.   This is where putting the dates on your freezer bags comes in handy. Now you can confidently grab a package from the freezer knowingly rather if you may have waited to long to use it. Specially if you worked so hard picking those fresh blueberries.   

Antioxidants and the Health Benefits

There is science behind how great blueberries taste called flavonoids along with the health benefits. Such as those little booger’s are high in antioxidants, high in fibers and low in calories. Vitamin C, K and magnesium. SUPERFOOD

Yours truly Mason J.A.R. Head